Melted chocolate can elevate your dessert game easily. You can dip strawberries in melted chocolate and set them with a topping of nuts, or drizzle cakes with drip chocolate. You can make chocolate fondues and fountains with melting chocolate. After melting, chocolate is versatile and can be used in both desserts and savory delicacies.
There are the best of melting chocolate candies available in the market that make the job easier. While these do not have the most authentic taste, they set quickly and can be reheated with ease if required. These are best for baked goods and decorative, edible art.
On the other hand, you can also choose to melt regular chocolates if you do not have access to these products, or if you want decadent chocolate flavor in your dishes. Melting chocolate requires skill and technique in this case, as the cocoa butter present in chocolate can be tricky for a cook. It requires slow cooking and certain precautions to be followed. One of these precautions is avoiding any contact with moisture so that the chocolate does not seize and form clumps.
We have rounded up a list below of the best melting chocolate products in the market. These are mostly wafers and candies with vegetable oil substituted for cocoa butter. However, you can also find premium chocolate baking bars among these top melting chocolate brands of 2021, that you can choose to melt at home.

Top Melted Chocolate Brands
[amazon bestseller=”Melted Chocolate” items=”10″ template=”list”]Wilton Chocolate Pro Fountain & Fondue Chocolate Wafers
The Wilton Chocolate Wafers are one of the best melting chocolates of 2021. This melting chocolate is best for chocolate fountains, fondues, and making candy molds. It can also be used as a dipping sauce for both sweet and savory items like cakes, pretzels, fruits, and chips. It has a great smoothness to it after melting. The chocolate melting process is quick and hassle-free. No extra oil is required for melting the chocolate. The wafers have a rich flavor and have premium cocoa butter. Once melted, the chocolate remains smooth for at least a few hours.
Hershey’s Kitchens Baking Chips
Hershey’s Kitchens Baking Chips come in various flavors and variants. Some of these variants are: semi-sweet, cinnamon, milk chocolate, etc. These are gluten-free and have zero artificial ingredients and preservatives for the health-conscious customers. This versatile product can be added to pancake mixes, batters, and cookies. These are perfect to be melted into a smooth drizzle that goes well on cakes, cookies, and other baked items. The good fat content means that the taste is rich and creamy. A sugar-free variant of this top melting chocolate brand is also available.
Ghirardelli Chocolate Melting Wafers
These Ghirardelli Chocolate Melting Wafers are easy to melt. The product comes in different variants and is GMO-free. It does not have artificial flavors, colors, or preservatives. For melting the chocolate wafers, one can use the microwave or a double boiler, stirring frequently at 15 second intervals. The result will be a glossy, silky finish of melting chocolate. This can be drizzled over edibles or used to dip fruits, pretzels, etc. in, as per the need. Ghirardelli’s chocolates have a rich flavor because they are made with the finest quality of cocoa beans.
Merckens Milk Chocolate Melts
Like most melting chocolate wafers in the market, the Merckens Milk Chocolate Wafers are also made from compound chocolate. This means that instead of cocoa butter found in the original chocolate, the wafers contain some amount of vegetable oil for easy melting. The Merckens Milk Chocolate Melts have 6-8% of cocoa. The smooth melted chocolate can be used on a variety of desserts and savory items. They are great for molding, drizzling, and dipping. These wafers make for hassle-free decoration on baked items.
ChocoMaker Fondue Dipping Chocolate Milk Chocolate
The ChocoMaker dipping chocolate candies are especially good for chocolate fountains and fondue. These melt easily, but the instructions must be followed to a T. The candies are easy to work with. Chocolate melting in this case requires no oil and can be done following the microwave method. The resultant melted chocolate has a smooth finish and a luscious taste. This can be used to decorate cakes or cookies, drizzle them with chocolate, as a dip for fruits and savory items. These melting chocolates are best if you want a gluten-free option.
Wilton Microwaveable Real Coffee Chocolate Melting Chocolates
These chocolate candies can be easily melted in the microwave without added oil. Make sure not to overheat it. The texture of the chocolate is smooth and has a healthy shine upon melting. This can be used in frosting, ganache, fondues, etc. It works great for molding candies in silicone molds. Customers report that the taste of the chocolate is delicious and authentic. This particular variant of the chocolate is coffee flavored but other types are also available in the market.
Oasis Supply Merckens Chocolate Wafers Candy Making Supplies
The Oasis Supply Merckens wafers melt into silky, creamy chocolate. It contains vegetable oil which makes it easy to melt. The chocolate is easy to work with and can be melted in the microwave or using a double boiler, stirring every 15 seconds. Make sure not to let water come into contact with the candies, else the melting chocolate will become lumpy. This is one of the best melting chocolates in the 2021 market that can be used in molding, shaping, and dipping. The taste is decent and the price point is economical as well.
Nestle Toll House Semi-Sweet Chocolate Morsels
These morsels are made from 100% real chocolate. These can be baked, melted, or directly had as snacks. The taste of these is delicious and the texture creamy. The product has specific instructions for melting, so it is best to follow these steps for the best looking melted chocolate. Being “semi-sweet”, these chocolates are not overly sweet and give you an authentic taste. Once melted, they are great for dipping fruits and nuts in. Nestle is a top melting chocolate brand used to decorate cakes and confectioneries.
Sephra Milk Chocolate Melts
The Sephra Milk Chocolate Melts is compounded chocolate that contains more than 5% vegetable oil. This is the best melting chocolate for use in chocolate fountains, molding, and coating. You will not require extra ingredients for melting the candies. Once dipped in your choice food, it hardens and sets quickly for a great finish. Most customers say that this product contains more oil, which is why it is easy to melt and gives a smooth finish. These candies are also trans fat-free.
Ghirardelli Milk Chocolate for Baking
Ghirardelli is a premium chocolate brand with an authentic and luxurious taste. Their chocolate products are made from the best roasted cocoa beans. These chocolate bars have an ideal and balanced taste with 11% cocoa. This product is one of the best for melting chocolate and is touted as ideal for baking. Unlike the wafers that are designed for easy melting, these chocolate bars do not contain vegetable oil. For melting it, you can use any of the methods mentioned in this post below. The melted product should be smooth and rich.
A few common mistakes while melting chocolate
You may be thinking, ‘How hard can it be, melting a piece of real chocolate?’. Turns out it requires tons of patience and a lot of technique.
Most commercial chocolate wafers and candies are formulated so that they are easy to melt in a jiffy. These products substitute the original cocoa butter found in chocolate with vegetable oil, which is easy to work with. But if you want your melting chocolate to have the best and most decadent taste, it is better to melt the regular chocolate chunks at home. This requires skill because cocoa butter can test your patience.
Make your best melting chocolate by avoiding the following mistakes and averting potential disaster.
Mistake #1 Overheating
The most common mistake that people commit while melting chocolate is to overheat the chocolate. You do not want to melt it directly on the stove as that will scorch it. When chocolate goes past a certain temperature, it burns before it melts. Scorched melting chocolate will form clumps and should not be eaten. One way of making sure that you do not burn it is to stop when some unmelted bits remain in the end. These will melt on their own because the chocolate will continue to cook for a while in the existing heat. Keep stirring the chocolate while it does so.
It is best to melt the chocolate on a double boiler, or a microwave oven. This ensures even heat distribution so that the chocolate melts slowly and smoothly.
Mistake #2 Not keeping the chocolate away from moisture
If you don’t keep moisture away from the chocolate, you may end up with a clumpy mess. While melting chocolate, make sure that water does not come into contact with it. Ensure that your equipment is dry before starting the process. Chocolate has a lot of butter and no moisture by itself. If it reacts with water, it will not maintain its consistency. Then you will end up with grainy and clumpy bits while melting it. This is known as “seizing”.
You also want to avoid covering the melting chocolate with a lid, as this could mean that any trapped moisture will condense and stick to the lid. These water droplets can drop into the chocolate. This could be a culinary mishap as it would cause the chocolate to seize.
Mistake #3 Melting big chunks
It is better to melt small and uniform pieces of chocolate, than to try and melt a big chunk. Melting chocolate this way may take a long time and the results may not be consistent. Chop up the chocolate before melting it, otherwise a large chunk will burn before it melts. Dark chocolate can be chopped roughly, but white chocolate must be broken into finer pieces as it is easier to burn.
Mistake #4 Not getting good quality chocolate
You also want to avoid using the wrong type of chocolate. Invest in a good chocolate so that your melted product is silky smooth and rich in taste. The chocolate should preferably have a good percentage of cocoa butter if you want the best flavor, instead of other oil substitutes.
Mistake #5 Not stirring often
It is always better to melt the chocolate slowly and to stir it frequently. This will distribute the heat in the chocolate melting process. Otherwise, your chocolate could clump. Then, the more you heat it, the lumpier it will get. You need to stir often to ensure a silky smooth finish to your melted chocolate and not turn it into a gloppy mess.
Mistake #6 Trying to quicken the process
Melting chocolate takes time. The trick is to be slow and patient. If you try to hasten the process, you will not be happy with the results. Heat it slowly and keep on stirring. Do not rush the cooking process. It is better not to let the chocolate exceed 30 °C in temperature.
How to Melt Chocolate: 5 Ways
Following are a few best methods for melting chocolate that work great according to us. These techniques are tried and tested. Each method may work better for a certain type of chocolate and has its own advantages.
1: The Microwave Method (Aka the Quick-And-Easy Way)
This method is often preferred by cooks because it is fast and easy.
The first requirement is to use the right type of bowl for melting chocolate in the microwave. These should typically be labelled as microwave-safe. You also need a spoon for melting your chocolate using this method as it involves a lot of stirring. Make sure to remove it each time you put the bowl back into the microwave.
Turn the heat settings of the microwave oven to low. Chop your chocolate into uniform and tiny pieces and place them in the bowl. Start the microwave for 30 seconds, then take out the bowl and stir the chocolate again. Repeat this process until the chocolate is almost fully melted. The remaining chocolate should melt on its own. This is because microwaved food continues to cook for a few minutes after removal, because of the high residual heat. Once melted, leave the chocolate to cool down for a bit before using.
Always keep an eye on the melting chocolate, as it may overcook from the high heat of the microwave.
2: The Double Boiler Method (Aka the Old-Fashioned Method )
This method is best if you want to watch the chocolate like a hawk while it cooks, ensuring that it does not burn. It distributes slow and even heat to melt the chocolate.
Place a heatproof bowl in a pot filled halfway with water. The bottom of the bowl should not touch the water. There should be no moisture inside the bowl either. Put chopped pieces of chocolate in the bowl. Place this double boiler apparatus on the stove and let it simmer over low heat. The slow simmering of the water will melt the chocolate evenly. Keep stirring with a rubber spatula until the chocolate has almost melted. Then remove it from the heat and stir till it melts completely.
Wipe the bottom of the bowl after removing it from the pot. The melting chocolate should not come into contact with water, otherwise it will seize and become grainy.
3: The Water Bath Method (Aka the Hands-Off Way)
You could use a slow cooker for this method. Place mason jars of chopped chocolate in a slow cooker filled with some water. Remove the lid and keep the heat setting on high while cooking.
The water will simmer on its own and the chocolate will start melting slowly. Make sure that no water gets into the jars, or else the chocolate will start to seize. After about 30 minutes, the chocolate will melt.
In this method, you can choose to put multiple small mason jars in the slow cooker. This way you can melt multiple batches or types of chocolate at once.
4: The Slow Cooker Method (Aka the Big-Batch Way)
To melt chocolate using only a slow cooker, simply put chopped pieces of chocolate into the cooker. Cover it and cook it on low for about an hour. You may need 10 or 20 more minutes to melt it completely. Make sure that you use a spatula to stir the chocolate in every 15 minutes or so. The cooker should not get too hot.
This method takes time, but is best for melting chocolate in large batches. Add milk, vanilla, and sugar to the mix in the cooker and you can make a fondue.
5: The Sandwich Bag Method (Aka the Decorator’s Method)
For melting chocolate using this method, put chopped chocolate in a Ziplock plastic bag. Seal it completely, then cover it with another sealed bag. Put this in a bowl full of hot water. The chocolate will now melt slowly. Make sure that water does not seep in through the bags in any way.
Once the chocolate melts, cut a small hole at the corner and drizzle the chocolate where you want to. This method is best for piping and decorating eatables.
You will have silky-smooth and the best melting chocolate if you follow any of these methods to perfection. After melting, chocolate can be used in a variety of ways. It adds a nice finishing touch to any dessert, baked item, or even regular fruits. Some ways in which you can use melted chocolate include:
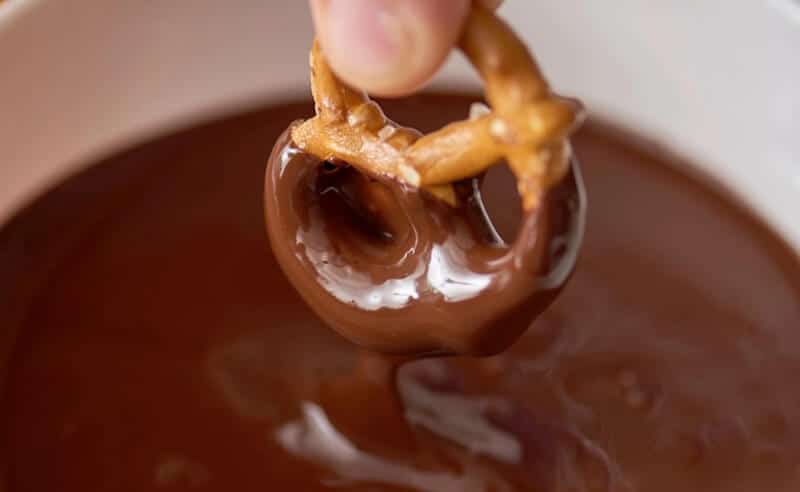
- For dipping fruits, such as strawberries. Dip a strawberry or a banana in melted chocolate. Dip this into an assortment of your favorite chopped nuts and rest it horizontally on a parchment paper to set. This makes for the perfect, quick dinner dessert once it sets.
- Place cookies or biscotti on a parchment paper and drizzle them lightly with melted chocolate. This adds a nice, sophisticated look to your dessert.
- Pipe melted chocolate using the plastic bag method, where you snip off a tiny corner of the bag. You can use this method to decorate cakes as you like.
- Drizzle melting chocolate over milkshakes, ice creams, and waffles. This will enhance the flavor easily.
- Mix melted chocolate with heavy cream to make a frosting or a ganache.
- Add it to hot chocolate or coffee along with whipped cream.
Read more: