Unless you have a large budget, the color options for your chosen refrigerators are limited. As with other white products, they are available in white, silver, or black as standard. What if you want a color change, like a blue or red refrigerator but can’t afford a multi-colored refrigerator? You guessed it right, get your old spray can and decorate your appliance.
In this post, we here at DaDongNy will teach you how to paint your refrigerator to make your kitchen decor stand out perfectly.
How To Spray Paint A Refrigerator
There are a couple of aspects to consider before deciding whether painting your refrigerator a new color is smart. When you’ve made up your decision and are ready to begin, do the following steps:
- Spray Paint Fridge In A Well-Ventilated Area
Spraying paint certainly is such a messy business. But, there are methods around it, such as wearing a gas mask and painting in an open-air environment, preferably outside or in your garage.
Since paint is flammable, avoid working in enclosed spaces like your workshop. But if you want to spray an appliance inside your house, get help from someone who can assist with lifting it using the proper gear, such as dollies.
- Before Painting The Refrigerator, Cover It With Drop Cloths
While painting can be messy, and some spills are unavoidable, there is a simple solution to protect your flooring and all of the wonderful wood on your porch. Cover the area with a drop cloth before spraying to avoid any possible sticky problems.
Drop cloths can be bought online or at hardware stores. If no drop cloth is available, it’s worth checking out what’s on offer in your local home improvement stores like Home Depot. Usually, they’ll offer tarpaulin and thick plastic sheeting accessible for purchase.
- Before Painting, Clean The Refrigerator
There are two methods for wiping down your refrigerator before painting it: apply a light cleaning solution or discard it.
It is easy to explain why ditching your refrigerator is a great cleaning method. You’re going to spend money on a new refrigerator anyway, and throwing your old one away will cost less than cleaning it.
Here’s a step-by-step instruction for cleaning your refrigerator’s surface:
- Unplug the refrigerator and pull it farther away from the wall. Avoid squashing the ice maker’s water line.
- Polish the exterior of the doors, sides, and top of the refrigerator using water and dish soap solution. Tidy the surfaces to remove dust and debris. To minimize streaking and spotting, wipe away the dish soap residues with a clean washcloth to dry any residual moisture.
- To restore the shine of your refrigerator, use a specific appliance spray, wipe, polish, or wax such as MiracleSpray.
- Sand The Surface Of The Refrigerator
Sanding is worthwhile, despite the added labor and time needed. It will provide you with a stunning paint job that lasts. If you don’t sand your refrigerator, the paint might not even stick properly to the surface. It may also peel and crumble away over time.
Here’s a step-by-step guide to sanding your refrigerator without damaging or scratching its surface:
- Smooth the edges of your refrigerator’s old paint by gently rubbing it in a circular motion with 220-grit sandpaper.
- Occasionally vacuum or hit the sandpaper against a hard surface to remove the dust. Replace the sandpaper once it’s encrusted.
- Now and then, fold the sandpaper to get a fresh sanding edge.
- When you’ve completed smoothing your refrigerator, clean off any sanding dust.
- Tape The Surface With Painter’s Tape
There are various measures you should take before starting your painting project. Take the time to tape off any parts that shouldn’t be painted, such as door knobs or hinges. You can do it using painter’s tape along with some elbow grease.
Furthermore, prime all surfaces that will be painted, including any woodwork, doors, or windows.
- Apply Primer To The Surface Of The Refrigerator
Spray paint the surface of your refrigerator with an oil-based primer. Before you start spraying, make sure the weather is hot enough. While holding a can about 8 inches from your equipment, spray at a zero-degree angle while moving back and forth.
With each pass, gently raise the pressure until all areas are coated. Let at least an hour for the primer to dry before painting to ensure you’re ready to go.
Once the paint is completely dry, you’ll notice that the primer and paint finish stick more properly. Even though the drying time might be long, many painting experts recommend leaving your primer another few hours to dry itself perfectly.
- Begin Spraying The Refrigerator
Apply multiple layers of paint instead of one heavy layer, just as you did with the primer. This will keep dripping to a minimum and maintain an even coating in your refrigerator.
When using the paint, hold it about 8 inches from the refrigerator. As with the primer, allow each layer to dry thoroughly before applying again.
Shake the paint thoroughly before using it, and try to avoid using too much paint since it makes it more difficult for the paint to dry.
After applying a layer of paint, allow it to cure for around an hour until painting over it with another coat. Use latex gloves to prevent paint on your fingers; otherwise, wash your hands after usage.
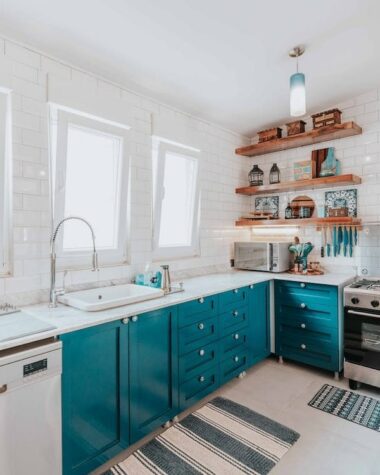
Choosing The Perfect Color For Your Refrigerator
- Integrate Your Kitchen Decor
Start by assessing the current appliances in your kitchen before selecting a finish. For example, if you already have stainless steel drawer knobs, a microwave, and a dishwasher, you may want to establish an integrated design by making your kitchen equipment match.
The current decor in your home could also assist in choosing the right color for your fridge. A farmhouse-style home, for instance, would’ve been perfect without a black stainless-steel-colored appliance. A simple appliance color like white with a golden finish would bring the look together.
Avoid modern stainless steel finishes if you want a midcentury modern look in your kitchen. Instead, go for basic colors that are reflective of the era. You could also go with neutral colors like the white or matte black finish of a custom-built-in appliance that complements your cabinets.
- Make A Statement
Making a statement with classic stainless steel or black paint is much more fun than keeping things simple. Perhaps you love an appliance that gives retro vibes.
If you want a warmer color that can complement any kitchen layout, go for a rose gold and copper finish.
- The Return Of White
Choosing a white finish for your fridge is a great suggestion for thrifty individuals. Using a non-stainless steel finish can help you save $100 or more on any appliance.
Also lovely are white appliances are stunning. White-colored appliances are making a comeback as Whirlpool introduced the White Ice collection, which gives their fridge a simple yet stunning appearance.
What Are The Best Color And Finish Options For Refrigerators?
If you’re tired of your refrigerator’s default color, changing it is the quickest and easiest way to give it a fresh look. Here are a few quirky color schemes you should use for your kitchen:
| White | You can also choose the classic white finish if your kitchen’s interior complements the tranquility of white. This color provides a soothing effect on the eyes. |
| Black | A black-colored refrigerator will always be a decent choice. There is little space for experimentation, and this color is a no-brainer if you don’t want to make a big deal out of your choice. |
| Yellow | The yellow color provides a tropical summer feel to your kitchen. It would also look great in a bohemian-style home or in pastel colors to provide a bright pop of color. |
| Orange | The orange finish in your refrigerator will give you sensations for days, like the relaxing yet refreshing feeling of an orange sunset or dawn. |
| Neon Colors | Neon colors are popular in the interior design industry today, following the current trend. A neon finish on your refrigerator will create a unique home decor look. |
| Pastel Colors | A pastel color fridge can fit your taste if you prefer your kitchen layout to be modest and stylish. It offers a relaxing vibe to your environment without drawing too much attention to itself. |
| Cool Colors | Blue, green, and pastel purple are all variations of cool colors. They are relaxing in nature. In contrast to warmer hues, cool colors evoke thoughts of the sea, the skies, or perhaps even the snow. Blue is a great color for your refrigerator if you like a natural look. |
| Tetradic Colors | To capitalize on the eye-catching potential of tetradic color schemes, use one color as the heavy focus while the remaining colors serve as supporting colors. As a result, you are also allowed to incorporate multiple shades of the same color to give your fridge a textured effect. |
Spray Paint Your Fridge As An Alternative
If you want to paint your refrigerator with spray paint, use an oil-based spray priming base beforehand. To thicken the mixture, shake the spray paint for about 60 seconds.
While spraying, hold the can about 8 inches away from your fridge and move it around while spraying to avoid unequal spots. Let it completely dry after that.
Make sure it’s for a metallic surface, and avoid matte finishes to avoid smudge marks before using your preferred spray paint shade. Pastel colors and yellow work well for a retro refrigerator finish.
Shake the can for sixty seconds, then hold the can for about 8 inches away from the fridge as you paint it. It may be necessary to finely sand between heavy or uneven coatings applications since they drip quickly.
The Best Spray Paint Products For Your Refrigerator
Generally, the best paint for a refrigerator is intended for use on metallic surfaces. Among the paints that fit under this category are:
- Appliance Epoxy
Appliance epoxy is a kind of enamel paint that may be applied on any interior device that does not interact with heat, such as your refrigerator.
This is an excellent option if you only want to clean up the surface of your refrigerator or maintain its current appearance. If your refrigerator is prone to rust, appliance epoxy is an excellent choice since it prevents corrosion.
They are available in various styles (sprayable or paintable) and are often available in several colors.
Get yours at Amazon!
- Spray Paint
You can use any spray paint for your refrigerator as long as it is made to be used on metals. Spray paint is a popular choice because it comes in a variety of colors and it is easy to apply.
Be sure to empty your refrigerator and paint it in a well-ventilated place to avoid contaminating any food with paint fumes.
Get yours at Amazon!
- Water-Based Paint
Water-based paint for metals can dry quickly and generate fewer fumes. If you want to use water-based paint, go with an acrylic one. Water-based acrylics are excellent for kitchen settings because they are more mold-resistant.
Water-based paint can be applied using a brush or a roller. You can apply a primer for a smoother and sharper finish, similar to the epoxy and spray paint alternatives.
Get yours at Amazon!
- Latex-Based Paint
Latex-based paint, like water-based paint, is simple to use and produces fewer fumes. However, it will not produce a finished look compared to other options.
Because latex paint is less indulgent than water-based paint, paint is as clean as possible.
Get yours at Amazon!
- Oil-Based Paint
Because of its longevity, oil-based paint is another great for your refrigerator. Even though a primer might enhance the look of the finished product, it’s only sometimes essential to use one using oil-based paint. As a result, oil-based paint is a fantastic choice if you want to save either time or cash on your DIY project.
Oil-based paint, like latex-based paint, is harsh. That is why you should avoid dripping paint on your refrigerator or painting in irregular patterns.
Get yours at Amazon!
Why Should You Prime Your Refrigerator Before Painting It
Priming your refrigerator before painting is highly advised. The primer functions as a barrier, allowing the paint to stick to the metal surface properly, creating a smooth foundation.
Paint may not stick properly to the surface of the metal without a primer, resulting in peeling. It is advisable to use a metal primer designed specifically for appliances, intended to stick to metallic surfaces and provide further protection against rust and moisture.
Furthermore, it is important to understand that not all primer products are equal, so choose one approved specifically for appliances.
FAQs
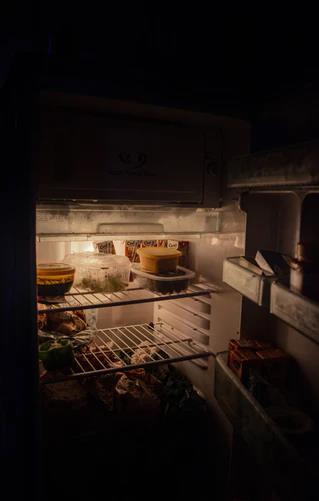
- Can You Spray The Inside Of Your Refrigerator As Well?
To put it simply, yes. You can paint the inner layer of your refrigerator as long as it is smooth and free of rough areas. The second thing you should do is use the right paint. Everything else will scrape and peel off.
- Is It Possible To Paint A Rusting Refrigerator?
Yes, of course, a rusted refrigerator can be painted. You can use any paint that you have used before. You have to remove the rust before painting. You may eliminate the rust by sanding the surface of the refrigerator or using lemon to wipe the rust off your fridge.
- How Can I Remove The Rust Out Of My Fridge?
Depending on the surface and type of rust, there are several methods for eliminating rust. Lemon juice is the most efficient method for removing rust from your refrigerator’s surface. Cut a lemon in half and smear it on the surface of your refrigerator for an hour.
Lemon juice is an excellent way to eliminate rust, which can be easily removed by sweeping off the juice as well as rubbing it with a cloth or towel. After that, your refrigerator should appear new.
- What Color Would Look Best On A Refrigerator?
The most common refrigerator colors and finishes are white, black, and stainless steel. They are tried-and-true choices that should work in the majority of kitchens.
- How Can I Make My Refrigerator More Hip?
Covering your refrigerator with washi tape is one of the easiest ways to make it hip. This adhesive tape is excellent since it can be used on a wide range of surfaces, such as the fronts of your refrigerator.
- Can You Repaint A Refrigerator in Whatever Color You Want?
Consider painting your refrigerator a new color if it is old, unappealing or if you want it to complement the rest of your kitchen’s decor.
Bottomline
We hope you liked our article about what it takes to paint your refrigerator. With this material, you can make the most of your DIY projects while repainting your new refrigerator, making your kitchen structure more aesthetically pleasing.
To learn more about refrigerators and how this valuable piece of equipment chills the food and beverages inside, check out the post here.
Articles You May Be Interested In
- A Cooler Choice: Whirlpool v.s GE Refrigerators (Full Guide)
- Refrigerator Check: LG v.s Samsung Refrigerators (Full Guide)
- Cool Tech Showdown: Frigidaire v.s Whirlpool Refrigerators (Full Guide)
- Fridge Favorites: Bosch v.s LG Refrigerators (Full Guide)
- Cooling Conundrum: Whirlpool v.s Samsung Refrigerators (Full Guide)
- Tale Of The Tape: Maytag v.s Whirlpool Refrigerators (Full Guide)
- Fridges in Focus: Thermador v.s Sub-Zero Refrigerators (Full Guide)
- Fridge Frenzy: Sub-Zero v.s Viking Refrigerators (Full Guide)
- The Big Chill: Whirlpool v.s KitchenAid Refrigerators (Full Guide)
- Refrigerator Bout: Whirlpool v.s LG Refrigerators (Full Guide)