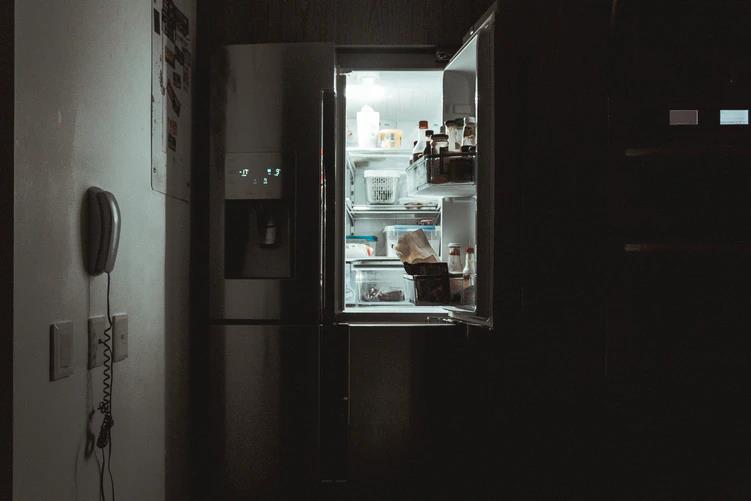
A refrigerator is everyone’s best buddy, especially on a hot summer day.
I mean, what is there to argue about? Nothing beats the first sip of your favorite cold brew to refresh you when the weather is blazing, and it isn’t easy to imagine where you’d be without a freezer. You won’t appreciate the summertime without ice.
Since so much of life depends on it, we here at DaDongNy will provide the necessary information on maintaining your favorite kitchen equipment in excellent condition. By vacuuming the evaporator coil on your refrigerator twice a year to get rid of the dust and gunk regularly, you can preserve the life of your appliance.
Furthermore, condenser coils also help keep what’s inside the refrigerator cold, making them an essential component you must take care of. Not only will this efficiently keep food items chilled, but it will also use less power, saving you money and benefiting the environment.
So, how do you clean refrigerator coils? Hang on to your seats, for we’ve got you covered!
But First, What Exactly Are Condenser Coils
Depending on the model of refrigerator you have at home, condenser coils are usually positioned on the bottom or rear of the refrigerator. To truly understand what the coils do, you must first comprehend how a refrigerator cools your food. To keep the fridge cold, a chemical refrigerant is used. The cooling process of a refrigerator the goes into four major components and processes:
- A compressor converts a gas refrigerant into a liquid. It then forces the water through the refrigerator condenser coils.
- Then the pressure and heat build-up as the refrigerant is pumped through the condenser coils. This is why the bottom or rear of your refrigerator is occasionally warmer.
- The refrigerant is pumped into the freezer coils at extreme pressure via an expansion valve. This expansion valve extends the pipe through which the refrigerant is flowing. As the pressure on the refrigerant is released, it cools and becomes a gas. This is similar to an aerosol can in that it turns into a chilly gas when the liquid is released from the pressurized container.
- The freezer coils are cooled by this gas, chilling the entire refrigerator. The gas then returns to the compressor, converted to a liquid, and the process begins again.
Refrigerator Coils: Do They Need To Be Cleaned?
Unless your refrigerator is extremely dusty or sticky, current models only require condenser coil maintenance in typical household conditions. Although, having many furry pets in your house raises the chance that the condenser coils will require cleaning, as pet hair often develops on the evaporator coils.
That is why you should consider cleaning your refrigerator condenser coils once a year to keep them working smoothly and improve their longevity.
Indications Of Potentially Soiled Refrigerator Coils
If you see these early symptoms of filthy refrigerator coils, you should act quickly before things worsen.
- The refrigerator makes a lot of noise;
- The refrigerator is constantly running.
- And the refrigerator is not cold.
Reasons To Clean The Coils On Your Refrigerator
Over time, dust, hair, and other impurities could wind up accumulating on your refrigerator’s condenser coils. This build-up helps your condenser work harder to keep the required temperature. If your coils are clogged, you may have any of the following issues:
- When your refrigerator has dirty coils, it may have to work more to maintain the temperature, which can increase your energy costs.
- The filthy coils might reduce the efficiency of your refrigerator and cause it to perform poorly.
- Filthy coils may shorten the longevity of your refrigerator.
Refrigerator Coils: How To Locate Them?
Below The Refrigerator
Cleaning condenser coils beneath the refrigerator can be tough when you can’t see exactly what you’re doing. As a result, a condenser coil cleaning kit that will help you clean underneath your refrigerator is recommended. Typically, the coils will not be covered, providing the ease of moving the brush below the refrigerator to eliminate the accumulated dirt.
Usually, a grill on your refrigerator’s bottom front covers the condenser coils. If the grill is not fixed with screws, it can easily be detached by loosening it with a Phillips-head screwdriver or pulling it off.
Behind The Refrigerator’s Rear Access Panel
The refrigerator must be removed from the wall and the access panel if the condenser coils are behind the refrigerator’s rear access panel. The rear access panel is usually removed by unhooking it from the clamps that keep it in place.
After removing the rear access panel, you should be able to view the condenser coils adjacent to the compressor. The coils may be cleaned with a vacuum cleaner.
Once you have the refrigerator separated from the walls and removed the access panel, you should be able to clean the compressors and other surrounding components to extend the life and performance of your refrigerator.
Refrigerator’s Back Cover
Condenser coils on the back of a refrigerator must always be cleaned, which requires removing the appliance from the wall. You may clean the coils with a vacuum cleaner or condenser coil cleaning kit. To achieve the best result, vacuum the coils, brush them, and then vacuum them again.
Six Easy Steps In Cleaning Your Refrigerator’s Condenser Coil
Clean coils once yearly to maintain your freezer and fridge working fine and more frequently when dealing with furry pets. It’s a quick and simple chore that you should not avoid. Follow the steps below to clean your coils and keep your fridge functioning smoothly:
How to Prepare: Tools
- Dust mask
- Small paintbrush
- Vacuum cleaner
- Pressurized gas
- Condenser coil cleaning kit (optional)
Step #1: Locate The Refrigerator Coils
Locating refrigerator coils is the first step in cleaning them. Current refrigerator models will have the coils hidden behind the refrigerator’s rear access panel or below the appliance. The coils on older models will be visible on the backside, at the bottom.
Step #2: Pick Up And Move The Fridge
If the coils are off the bottom front part of your equipment, they’re probably at the back, so you’ll have to move the fridge to get to them. If your refrigerator has wheels, pull it outward. However, you might have to employ considerable force to progressively slide the fridge away until the rear is reachable. When moving the fridge, you should always use caution to avoid damaging your floor.
Step #3: Turn Off The Refrigerator
Always disconnect the refrigerator before performing any repair work. Having to deal with a live appliance is never a good idea, and while the possibilities of getting electrocuted are tiny, it’s not a risk you want to take.
Step #4: Vacuum The Condenser Coils
If the condenser coils are exposed, you may begin vacuuming immediately. Otherwise, you must first remove a panel. The panel is normally simple to take out, but if you’re having trouble, see the refrigerator’s manual for removal instructions.
If you haven’t cleaned it in a long time or haven’t cleaned it at all, there will be a large build-up of dirt. To access the coils, use a vacuum with a flattened cleaner attachment.
Step #5: Spray And Scrape
Regardless of the vacuum attachment, certain dirt or particles will be challenging to get rid of. Scrub these areas clean with a paintbrush or an old toothbrush to get rid of any obstinate debris.
Depending on the configuration of the coils, a vacuum or a brush may not be able to reach all of them. A can of pressurized gas can be useful in this situation. To remove dust, try something as easy as WD-40. Utilizing an air duster might result in a splatter of dust, grime, and other particles. Despite this downside, employing an air duster is a good way to get rid of everything that might harm the coils’ performance.
Step #6: Bring The Refrigerator Back Into Position
If you removed your refrigerator during the early steps, scrub the surrounding area and underneath it before moving it back again. This location can be challenging to reach for cleaning, so make the most of this occasion. Similarly, when you return the refrigerator, vacuum any debris left behind. When you’re through vacuuming, put your fridge back on and set it back where it belongs.
What Should I Expect Once the Refrigerator Coils Have Been Cleaned?
After cleaning the condenser coils, your refrigerator should be quieter and much more powerful. If it continues to be slow, an appliance repair specialist will be able to troubleshoot it for you.
Can I Reduce My Energy Costs By Cleaning My Coils?
To put it bluntly. To summarize, dirty refrigerator condenser coils can produce an array of difficulties, but you don’t have to worry because cleaning them should be a piece of cake. Additionally, this could save you money down the road.
Bottomline
The condenser coils may need to be cleaned to resolve the problem and maintain the refrigerator’s peak performance if it isn’t cooling due to excessive dirt.
Access to your refrigerator’s condenser coils can be found anywhere underneath the refrigerator, behind a rear access panel, or on the refrigerator’s back. One of the most efficient ways to clean this essential fridge component is to purchase a condenser coil cleaning kit or a home vacuum cleaner.
With the information and extensive tutorials provided in this tutorial, we hope that we have assisted you in taking care of your refrigerator, especially the condenser coils.
To learn more about refrigerators and how this valuable piece of equipment chills the food and beverages inside, check out the post here.
Articles You May Be Interested In
- A Cooler Choice: Whirlpool v.s GE Refrigerators (Full Guide)
- Refrigerator Check: LG v.s Samsung Refrigerators (Full Guide)
- Cool Tech Showdown: Frigidaire v.s Whirlpool Refrigerators (Full Guide)
- Fridge Favorites: Bosch v.s LG Refrigerators (Full Guide)
- Cooling Conundrum: Whirlpool v.s Samsung Refrigerators (Full Guide)
- Tale Of The Tape: Maytag v.s Whirlpool Refrigerators (Full Guide)
- Fridges in Focus: Thermador v.s Sub-Zero Refrigerators (Full Guide)


